Suur pidu väärib suurepäraseid fotosid. Selle asemel, et rentida mahukat fotokabiini või printida tohutut bännerit, saate stiilse tausta luua kodus. See juhend käsitleb praktilisi sünnipäevafotonurga ideid, kasutades isekleepuvaid seinakleebiseid, et luua puhas, kaameravalmis ruum vähem kui tunniga.
Saate teada, kuidas kujundada isetehtud sünnipäevafotoala, mis näeb välja läbimõeldud, sobib teie valgustusega ja on pärast pidu kergesti eemaldatav. Olenemata sellest, kas plaanite lastepidu, verstapostisünnipäeva või väikest täiskasvanute kogunemist USA-s või Euroopas, hoiab see samm-sammult lähenemine asjad lihtsana, paindlikuna ja rendisõbralikuna.
Mis on sünnipäevafotonurga ideed ja miks valida isetehtud lahendus?
Sünnipäevafotonurga ideed keskenduvad spetsiaalse seina või kujundatud ruumi loomisele, kus külalised saavad meeldejäävaid pilte teha. Isetehtud sünnipäevafoto lahendus võimaldab teil kontrollida teemat, paigutust ja eelarvet ilma professionaalset kabiini rentimata.
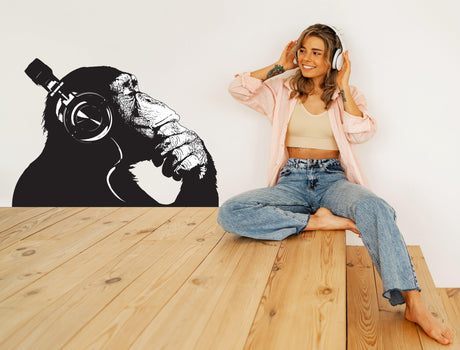
Erinevalt täielikest fotokabiinidest, mis nõuavad seadmeid, raame ja aluseid, kasutab isetehtud fotonurk teie olemasolevat seina ja täiustab seda isekleepuvate kleebistega. See hoiab ruumi avatuna ja loomulikuna. Külalised saavad vabalt liikuda ja te väldite kaableid või mahukaid konstruktsioone.
Isetehtud lahendusi on ka lihtsam isikupärastada. Saate lisada vanuse numbreid, nimesid, verstaposti kuupäevi või teemaelemente, mis sobivad teie värvipaletiga. Eemaldatavad vinüülkleebised teevad selle võimalikuks ilma auke puurimata või tugevate liimide kasutamiseta.
Korterite puhul Saksamaal, Eestis või paljudes USA linnades, kus seinakahjustused ei ole lubatud, pakub isekleepuv dekoor nutikat lahendust. Pärast pidu eemaldage lihtsalt elemendid ja taastage seina algne seisukord.
Kuidas luua isetehtud sünnipäevafotonurk isekleepuvate kleebistega?
Alustage õigest seinast. Valige sile, segamatu pind, mille laius on piisav vähemalt kahele inimesele mugavaks seismiseks. Neutraalselt värvitud seinad on ideaalsed, sest need lasevad kaunistustel selgelt esile tulla.
Mõõtke oma seina pindala enne kleebiste tellimist. Planeerige oma kompositsioon esmalt põrandal. See aitab teil näha vahekaugusi ja tasakaalu. Tugevad sünnipäevafotonurga ideed tuginevad sümmeetriale ja selgele fookuspunktile.
Isekleepuvad kleebised on praktilised, sest need kleepuvad kindlalt sileda värvi külge ja eemalduvad pärast üritust puhtalt. Need on kergemad ja lihtsamini paigaldatavad kui suured prinditud taustad.
Järgige seda 5-astmelist paigaldusmeetodit:
-
Puhastage sein kuiva lapiga tolmu eemaldamiseks.
-
Märkige pliiatsiga kergelt keskjoon.
-
Paigaldage esmalt suured elemendid, näiteks vanuse numbrid või peamine fraas.
-
Lisage fookuspunkti ümber väiksemaid aktsente.
-
Astuge tagasi, et kontrollida vahekaugusi enne servade kindlat surumist.
Pärast paigaldamist testige mõnda fotot. Seiske seina eest 1,5–2 meetri kaugusel, et saada loomulikud proportsioonid. Hästi kujundatud isetehtud sünnipäevafoto nurgas peaksid inimesed olema raamitud, ilma et taust neid varjutaks.
Sünnipäevafotonurga ideed lastele ja täiskasvanutele
Parimad sünnipäevafotonurga ideed sõltuvad vanusest, isiksusest ja teemast.
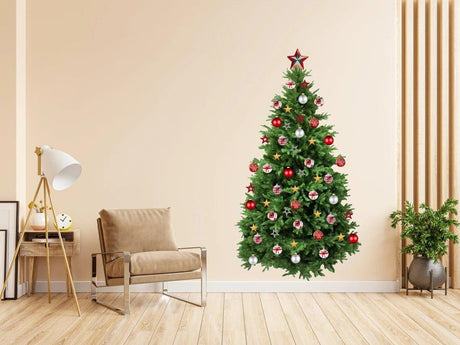
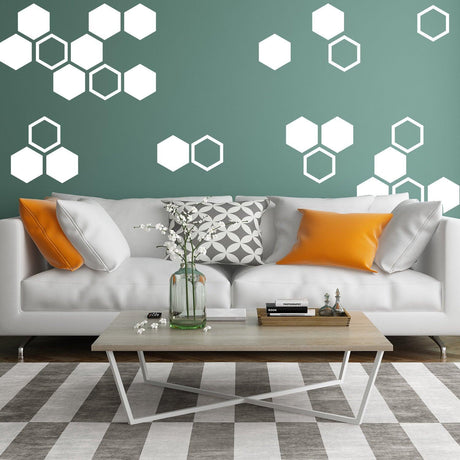
Lastele sobivad hästi mängulised kujundid ja julged värvid. Loomakleebised, tähed, pilved või temaatilised illustratsioonid loovad energiat. Hoidke paigutus struktureeritud, et see fotodel kaootiline ei näeks. Tavaliselt piisab kolmest põhivärvist.
Täiskasvanutele näevad puhtad ja minimalistlikud kujundused sageli paremad välja. Neutraalsed seinad metallist numbrite või elegantse tüpograafiaga tunduvad moodsad. Verstapostisünnipäevad, nagu 18, 30, 40 või 50, saavad kasu julgetest numbritest, mis on paigutatud silmade kõrgusele.
Siin on mitmekülgsed inspiratsioonikontseptsioonid:
- Minimalistlik valge sein ülegabariitse vanuse numbri ja väikeste tähtedega.
- Pastellvärvi õhupalliklaster kombineerituna sobivate seinakleebistega.
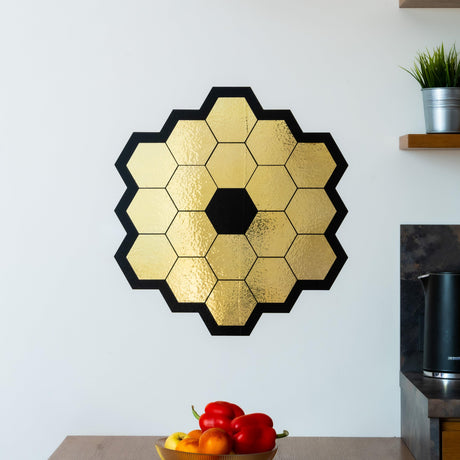
- Must-kuldne verstaposti kujundus õhtupidudeks.
- Džungliteemaline aktsentsein laste sünnipäevafotode jaoks.
- Nimekiri keskel õlgade kõrgusel portreede jaoks.
Iga kontseptsiooni saab teostada kui isetehtud sünnipäevafoto lahendust, kasutades eemaldatavaid seinakleebiseid. Hoidke keskosa veidi avatuna, et näod jääksid pildi fookusesse.
Kuidas parandada valgustust ja muuta oma sünnipäevafotod professionaalseks?
Valgustus määrab, kas teie taust näeb välja lihvitud või lame. Isegi tugevad sünnipäevafotonurga ideed vajavad kaamera jaoks korralikku valgustust.
Looduslik valgus on kõige lihtsam lahendus. Asetage fotonurk akna lähedale, kuid vältige otsese päikesevalguse langemist seinale. Külalised peaksid seisma taustast veidi eemal, et vähendada tugevaid varje.
Kui looduslik valgus on piiratud, kasutage rõngastuli või kahte lampi, mis on paigutatud 45-kraadise nurga alla. See tasakaalustab varje ja esiletõsteid. Hoidke valgust veidi silmade kõrgusest kõrgemal, et vältida silmade all olevaid varje.
Läikivad elemendid võivad valgust peegeldada ja tekitada peegeldusi. Mattkleebised toimivad fotodel sageli paremini. Testige oma isetehtud sünnipäevafoto nurka enne külaliste saabumist. Tehke näidisfotosid ja reguleerige vajadusel kaugust või valguse kõrgust.
Väikesed muutused valgustuse asukohas võivad foto kvaliteeti oluliselt parandada.

Kas isekleepuvad kleebised kahjustavad seinu pärast pidu?
Kvaliteetne eemaldatav vinüül, mida kasutatakse isetehtud sünnipäevafoto lahenduses, on disainitud puhtaks eemaldamiseks korralikult kuivanud värvitud seintelt.
Oodake pärast värvimist vähemalt kaks kuni kolm nädalat enne kleebiste paigaldamist. Värske värv võib eemaldamisel kooruda. Siledad matt- ja satiinviimistlused võimaldavad tavaliselt lihtsamat paigaldamist ja eemaldamist.
Kleebiste eemaldamiseks koorige aeglaselt ühe nurga alt madala nurga all. Vältige otse väljapoole tõmbamist. See vähendab värvikihi pinget.
Siin on kiire pinnavõrdlus:
|
Pinna tüüp |
Nakkuvuse kvaliteet |
Eemaldamise lihtsus |
Nõuanne |
|
Matist värvitud sein |
Tugev |
Lihtne |
Veenduge, et värv on täielikult kuivanud |
|
Satiin/poolmatt värv |
Väga tugev |
Lihtne |
Koorige aeglaselt ja ühtlaselt |
|
Tekstuuriga sein |
Mõõdukas |
Mõõdukas |
Suruge paigaldamisel servi kindlalt |
|
Klaas või peegel |
Tugev |
Väga lihtne |
Puhastage põhjalikult enne paigaldamist |
Väikese tüki esmalt testimine annab täiendava kindluse. Korralikult paigaldatud kleebised lasevad teie sünnipäevafotonurga ideedel peo ajal särada ja pärast puhtalt kaduda.
Kuidas ehitada eelarvesõbralik sünnipäevafotonurk, mis näeb välja esmaklassiline?
Esmaklassiline välimus sõltub pigem disainidistsipliinist kui kallitest materjalidest.
Esiteks, kasutage negatiivset ruumi. Ärge katke kogu seina. Üks selge fookusklaster näeb sageli professionaalsem välja kui rahvarohke taust.
Teiseks, piirake oma paletti kahe või kolme värviga. Järjepidevus loob harmoonia. Liiga paljude toonide segamine võib muuta isegi tugevad sünnipäevafotonurga ideed sassi.
Kolmandaks, kombineerige õhupalle ja kleebiseid hoolikalt. Täieliku õhupallikaare asemel kasutage ühel küljel väikest klastrit ja tasakaalustage seda seinal olevate isekleepuvate elementidega.
Vahekaugus on kriitiline. Mõõtke elementide vahel võrdsed kaugused, mitte ärge asetage neid juhuslikult. Puhas, tsentreeritud isetehtud sünnipäevafoto kujundus tundub läbimõeldud ja rafineeritud.
Läbimõeldud planeerimisega saab isegi väikeses korteris korraldada stiilse ja fotovalmis peoala.
Kust osta sünnipäevaseinakleebiseid isetehtud fotonurkade jaoks USA-s ja Euroopas?
Materjali kvaliteet mõjutab nii paigaldust kui ka lõplikke fototulemusi. Otsige isekleepuvaid kleebiseid, mis on disainitud siledatele siseruumide pindadele ja millel on selged suuruse detailid.
Mõõtke oma seinapind enne tellimist ja kontrollige hoolikalt tarneaegu. Kui korraldate sünnipäeva USA-s, Saksamaal või Eestis, tellige varakult, et vältida viimase hetke stressi.
Decordsist leiate eemaldatavaid seinakleebiseid, mis sobivad temaatilisteks sünnipäevakujundusteks ja fototaustadeks. Selged tootekirjeldused ja pinnaühilduvuse juhised aitavad teil enesekindlalt valida.
Hästi kujundatud isetehtud sünnipäevafoto nurk muudab iga ruumi peoalaks. Isekleepuva dekooriga saate paindlikkuse, lihtsa eemaldamise ja professionaalse välimusega pildid ilma keeruliste paigaldusteta.
KKK - isetehtud sünnipäevafotonurk (isekleepuv)
Millised on kõige lihtsamad sünnipäevafotonurga ideed väikesesse korterisse?
Valige üks puhas sein ja looge üksainus fookusklaster. Kasutage ühte suurt elementi, näiteks vanuse numbrit, ja mõnda väiksemat aktsenti selle ümber. See hoiab seadistuse lihtsa ja visuaalselt tasakaalus.
Kui suur peaks olema isetehtud sünnipäevafototaust?
Enamiku kodude puhul on 1,5–2 meetri laius piisav kahele inimesele. Grupifotode jaoks püüdke 2,5–3 meetri peale või asetage kaamera kaugemale, et kogu kaader mugavalt jäädvustada.
Kas isekleepuvad kleebised kahjustavad värvi?
Siledatel ja täielikult kuivanud värviga seintel tulevad eemaldatavad kleebised tavaliselt puhtalt maha. Koorige aeglaselt madala nurga all. Kahtluse korral testige alati esmalt väikest tükki.
Kui kaua pärast värvimist saan kleebiseid paigaldada?
Oodake pärast värvimist vähemalt 2–3 nädalat. See tagab värvi kuivamise ja vähendab eemaldamise ajal koorumise ohtu.
Milline valgustus sobib sünnipäevafotodeks kõige paremini?
Loomulik aknast tulev valgus sobib kõige paremini. Kui see pole saadaval, kasutage rõngastuli või kahte lampi 45-kraadise nurga all. Hoidke subjekte seinast veidi eemal, et vältida tugevaid varje.
Kas ma saan kleebiseid kasutada klaasil või ustel?
Jah, sile klaas ja riidekapi paneelid on sobivad pinnad. Puhastage need põhjalikult enne kleebiste paigaldamist, et tagada parim nakkumine.
Kuidas teha sünnipäevafotonurk eelarves kalli välja nägema?
Kasutage vähem elemente, hoidke värvid ühtlasena ja keskenduge sümmeetriale. Puhas vahekaugus ja läbimõeldud paigutus tõstavad lihtsad materjalid esmaklassiliseks lahenduseks.