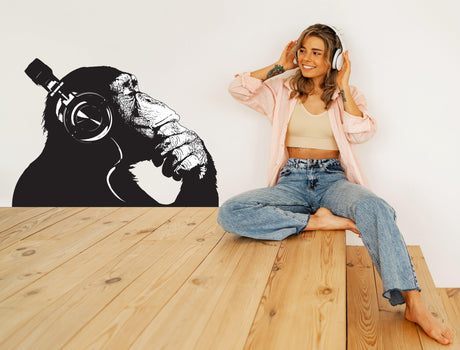
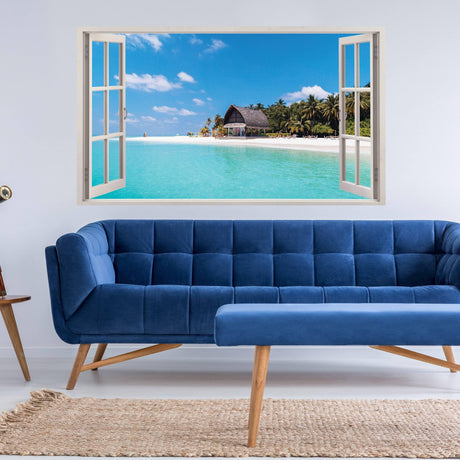
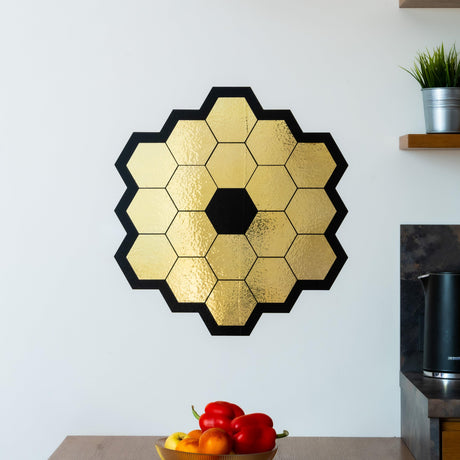
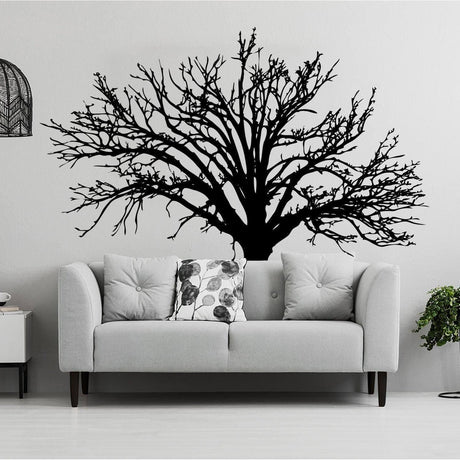
Messen Sie die freie Wandfläche und vergleichen Sie sie mit der gesamten Breite und Höhe des Motivs. Prüfen Sie beide Maße. Ein Wandtattoo kann in der Breite passen und trotzdem zu hoch sein.
Der kostenlose Rechner prüft die Maße in Zentimetern oder Zoll. Er zeigt auch die Abstände um ein mittig platziertes Motiv. Darunter finden Sie ein Maßblatt zum Ausdrucken und Tipps für Fensterfolien, Wandbilder, Fahrzeugaufkleber und 3D-Deko.
Zum Größenrechner · Maßblatt herunterladen · Andere Produkte ausmessen
Wandtattoo-Größenrechner
Der Rechner prüft die Maße eines bereits ausgewählten Motivs. Er berechnet keinen Preis und prüft nicht, ob das Material auf Ihrer Wand haftet.
So verwenden Sie den Rechner
- Wählen Sie Zentimeter oder Zoll.
- Geben Sie Breite und Höhe der freien Wandfläche ein. Möbel, Steckdosen, Fenster und andere Hindernisse gehören nicht dazu.
- Geben Sie die gesamte Breite und Höhe des Motivs aus der Produktbeschreibung ein. Bei einzelnen Elementen zählt Ihre geplante Anordnung, nicht die Größe des Trägerbogens.
- Wenn Platz um das Motiv bleiben soll, geben Sie den gleichen Mindestabstand für jeden Rand ein. Mit 0 prüfen Sie nur die Abmessungen.
- Klicken Sie auf Passform prüfen. Das Ergebnis zeigt, ob das Motiv passt und welche Abstände bei mittiger Platzierung bleiben. Markieren Sie den Umriss vor der Bestellung an der Wand.
Beim Wechsel der Einheit werden eingegebene Werte umgerechnet. Sie können einen Punkt oder ein Komma verwenden, zum Beispiel 24.5 oder 24,5.
So messen Sie für ein Wandtattoo
Messen Sie die freie Wandfläche ohne Möbel, Schalter, Steckdosen, Leisten, Regale, Lampen und andere Hindernisse. Stimmen Sie das Wandtattoo auf die darunterstehende Möbelgruppe ab, nicht nur auf die gesamte Wand.
- Messen Sie die nutzbare Wandbreite und -höhe.
- Messen Sie Sofa, Bett, Schreibtisch oder Schrank unter dem geplanten Motiv.
- Markieren Sie die genauen Maße der ausgewählten Produktvariante.
- Betrachten Sie den Umriss vom Eingang und von der üblichen Sitz- oder Stehposition aus.
- Klären Sie, ob sich einzelne Elemente unabhängig voneinander anordnen lassen.
Notieren Sie bei mehrteiligen Sets sowohl die Größe des gelieferten Bogens als auch die geplante fertige Anordnung. Werden die Elemente mit Abstand angebracht, kann die fertige Komposition breiter oder höher sein als der Trägerbogen.
Rechenbeispiel: Breite und Höhe gemeinsam prüfen
Angenommen, über einem Schrank stehen 120 cm Breite und 80 cm Höhe zur Verfügung. Vergleichen Sie die folgenden beiden Beispielgrößen in der Reihenfolge Breite × Höhe. Die Werte dienen nur zur Veranschaulichung. Für Ihre Bestellung gelten die tatsächlichen Maße auf der Produktseite.
| Beispielgröße des Wandtattoos | Passt es auf die gemessene Fläche? |
|---|---|
| 90 × 60 cm | Ja. Mittig angebracht bleiben auf jeder Seite 15 cm und oben sowie unten jeweils 10 cm frei. |
| 120 × 85 cm | Nein. Die Breite passt, aber das Motiv ist 5 cm höher als die verfügbare Fläche. |
Beim kleineren Beispiel beträgt der seitliche Abstand (120 − 90) ÷ 2 = 15 cm. Markieren Sie den Umriss von 90 × 60 cm mit ablösbarem Malerkrepp, um die Anordnung zu beurteilen. Wird bei einer Größenoption nur ein Maß genannt, klären Sie vor der Bestellung auch das zweite.
Kostenloses Maßblatt für Wandtattoos zum Ausdrucken
Notieren Sie auf dem einseitigen Blatt die nutzbare Wandfläche, die Gesamtmaße des Motivs und mögliche Hindernisse. Halten Sie fest, ob die ausgewählte Größe ein einzelnes Element, den gelieferten Bogen oder die fertige Anordnung beschreibt.
Deutsches Maßblatt herunterladen (PDF, eine A4-Seite, Zentimeter).
Drucken Sie das Blatt aus und füllen Sie es von Hand aus. Es ist eine Planungshilfe für Wandtattoos, keine Vorlage im Maßstab 1:1 und keine freigegebene Produktionszeichnung. Für Fensterfolien, Dekorfolien, Fototapeten und räumliche 3D-Produkte gelten die jeweiligen Abschnitte unten und die Hinweise zum ausgewählten Produkt.
Wie eine ausgedruckte Motivvorlage und die fertige Wand zusammenpassen, zeigt unsere Fotogeschichte aus einem Kinderzimmer. Nutzen Sie die Fotos für Gestaltungsideen und die schriftlichen Produktmaße zur Größenprüfung.
Produktspezifische Maße und Angaben zum Untergrund finden Sie in der Kollektion Wandtattoos und Wandsticker.
Prüfen Sie vor der Bestellung, ob die angegebenen Maße für einen einzelnen Aufkleber oder die gesamte Anordnung gelten. Vergleichen Sie die fertige Breite und Höhe mit der freien Wandfläche. Lassen Sie Platz um Möbel, Schalter und Steckdosen und beachten Sie die Anforderungen an den Untergrund.
So messen Sie Fenster und Glasflächen
Messen Sie die sichtbare Glasfläche innerhalb von Rahmen, Dichtungen oder Glasleisten. Prüfen Sie Breite und Höhe an mehreren Stellen. Notieren Sie Griffe, Schlösser, Scharniere, Sensoren, Sprossen, Silikonfugen, vorhandene Folien und erforderliche Sicherheitsmarkierungen.
Für einen einzelnen Fensteraufkleber
- Notieren Sie die gewünschte Breite und Höhe des Aufklebers.
- Geben Sie an, ob er innen oder außen angebracht wird.
- Klären Sie, ob der Text von außen durch das Glas lesbar sein muss.
- Markieren Sie Betrachtungshöhe und erforderliche freie Sichtbereiche.
Für eine voll- oder teilflächige Fensterfolie
- Messen Sie jede Scheibe einzeln.
- Notieren Sie die gewünschte Abdeckung: etwa ganze Scheibe, Sichtschutzstreifen oder unterer Bereich.
- Messen Sie die Höhe eines Sichtschutzstreifens von einem festen Bezugspunkt am Boden oder Rahmen aus.
- Klären Sie, ob eine Beschnittzugabe bereits enthalten ist.
- Kennzeichnen Sie mehrere Scheiben auf Fotos und in der Maßliste eindeutig.
Die Montageseite beeinflusst Motivrichtung und Sichtbarkeit. Ein innen angebrachtes Logo, das von außen gelesen werden soll, kann eine spezielle Vorbereitung für die Hinterglasmontage benötigen. Nutzen Sie den Vergleich von Sichtschutzfolien (auf Englisch) und die Kollektion Fenster- und Glasaufkleber.
So messen Sie ein Fahrzeug für Aufkleber und Beschriftungen
Messen Sie die tatsächlich nutzbare Karosseriefläche, nicht die gesamte Tür oder Fahrzeugseite. Erfassen Sie Türspalten, Griffe, Embleme, Leisten, Tankklappen, Leuchten, Kameras, Sensoren, Karosserielinien, Rundungen und strukturierte Verkleidungen.
- Reinigen Sie die Fläche ausreichend, damit ihre Grenzen erkennbar sind.
- Messen Sie nutzbare Breite und Höhe an der vorgesehenen Position.
- Notieren Sie Rundungen und den Abstand zu den Bauteilkanten.
- Fotografieren Sie das Fahrzeug gerade von der benötigten Seite, von vorn oder von hinten.
- Halten Sie ein vor Ort überprüftes Maß im Foto fest.
- Messen Sie linke und rechte Seite getrennt, wenn Karosserie oder Motiv nicht symmetrisch sind.
- Halten Sie Text, Gesichter und wichtige Logodetails von Spalten und Griffen fern.
Skalieren Sie ein Foto nicht anhand eines vermuteten Raddurchmessers oder einer Fahrzeugvorlage aus dem Internet, ohne die Maße am Fahrzeug zu prüfen. Sichtbereiche, Fenster, Leuchten und Zulassungskennzeichen müssen entsprechend den geltenden Anforderungen frei bleiben. Lesen Sie den Leitfaden für Fahrzeugaufkleber und entdecken Sie die Fahrzeugaufkleber-Kollektion.
So messen Sie Möbel und Haushaltsgeräte zum Folieren
Messen Sie jede sichtbare Fläche einzeln. Schranktür, Schubladenfront, Seitenwand, Tischplatte und Gerätetür sind separate Teile, auch wenn sie optisch eine Einheit bilden.
| Detail | Benötigte Angaben |
|---|---|
| Vorderseite | Freie Breite und Höhe nach dem Abnehmen oder Aussparen von Griffen und Beschlägen |
| Kanten und Umschläge | Kantentiefe und benötigtes Material zum Umlegen |
| Vertiefungen und Profile | Tiefe, Radius sowie gefräste oder hervorstehende Details |
| Bewegliche Teile | Erforderliche Abstände um Scharniere, Schubladen, Türen und Dichtungen |
| Musterrichtung | Gewünschte Richtung von Holzmaserung, Steinmuster oder wiederkehrendem Motiv |
| Beanspruchung | Wärme, Dampf, Fett, Reinigungsmittel und häufige Berührung |
Berechnen Sie eine ganze Küche oder Möbelgruppe nicht als ein einziges Rechteck. Erstellen Sie eine nummerierte Teileliste mit einem kleinen Zuordnungsfoto für jede Fläche. Entdecken Sie Möbelfolien und Renovierungsaufkleber.
So messen Sie für einen Bodenaufkleber
Messen Sie die freie Bodenfläche ohne Schwellen, Abläufe, Dehnungsfugen, tiefe Fliesenfugen, Treppen, abrupte Höhenunterschiede und feststehende Gegenstände. Notieren Sie die hauptsächliche Annäherungsrichtung, da perspektivische Motive meist von einem bestimmten Blickpunkt aus am stärksten wirken.
- Messen Sie freie Breite und Höhe.
- Markieren Sie den geplanten Umriss mit ablösbarem Klebeband.
- Prüfen Sie die Ausrichtung vom Eingang oder der Kameraposition aus.
- Notieren Sie Bodenmaterial, Oberfläche, Struktur und vorhandene Beschichtung.
- Erfassen Sie Laufverkehr, Reinigung, Feuchtigkeit sowie bewegte Stühle oder Wagen.
Verwenden Sie ausschließlich ein ausdrücklich für Böden vorgesehenes Produkt. Entdecken Sie Bodenaufkleber mit 3D-Effekt und Vinyl-Bodensticker.
So messen Sie für Tapeten und Fototapeten
Messen Sie die Breite oben, in der Mitte und unten. Messen Sie die Höhe links, mittig und rechts. Notieren Sie Türen, Fenster, Steckdosen, Schalter, Schrägen, Säulen, Decken- und Sockelleisten sowie feste Möbel.
- Verwenden Sie die vom Anbieter vorgegebene Beschnittzugabe.
- Fügen Sie keine beliebige Zugabe hinzu, wenn ein individuelles Motiv nach einem festgelegten Bahnenplan vorbereitet wird.
- Messen Sie bei zusammenhängenden Wänden jede Wandfläche einzeln.
- Klären Sie, an welchen Stellen die Bahnenstöße das Motiv durchlaufen.
- Halten Sie wichtige Gesichter, Logos und Texte von problematischen Stößen und Ecken fern.
- Bestätigen Sie den endgültigen Bildausschnitt, Beschnitt, die Bahneneinteilung und Ausrichtung.
Technische Einzelheiten finden Sie im Leitfaden zu Fototapeten und Bahnenplanung. Entdecken Sie Tapeten und Fototapeten.
So messen Sie räumliche 3D-gedruckte Dekoration
Räumliche 3D-Produkte benötigen Angaben zu Breite, Höhe und Tiefe. Eine ausgewählte Größe kann die längste Außenabmessung bezeichnen, nicht die nutzbare Ablage, Öffnung oder Plattform.
| Produktdetail | Zu prüfendes Maß |
|---|---|
| Gesamtes Objekt | Maximale Breite, Höhe und Ausladung von der Wand |
| Nutzbare Ablage oder Plattform | Tatsächliche Breite und Tiefe am vorgesehenen Standort des ausgestellten Gegenstands |
| Nische oder Fach | Innere Breite, Höhe und Tiefe |
| Ausgestellter Gegenstand | Maße der Standfläche, Höhe und Gesamtgewicht |
| Befestigung | Positionen von Löchern, Schlitzen oder Halterungen sowie Wandaufbau |
| Freiraum | Abstand zu Türen, Vorhängen, Möbeln, Heizgeräten und Laufwegen |
Eine größere Außenabmessung bedeutet nicht automatisch eine höhere Tragfähigkeit. Prüfen Sie die produktspezifische Montageart und verwenden Sie geeignete Wandbefestigungen. Ein Beispiel bietet der Leitfaden zur Auswahl eines 3D-gedruckten Pilzregals (auf Englisch). Entdecken Sie außerdem 3D-gedruckte Wohnaccessoires und Geschenke.
So messen Sie für individuelle Schriftzüge, Logos und Aufkleber
Geben Sie bei Sonderanfertigungen sowohl die verfügbare Montagefläche als auch die gewünschten Endmaße der Grafik an. Eine Logodatei allein legt die passende physische Größe nicht fest.
- Endgültige Breite und Höhe
- Stückzahl und Anzahl der Motivversionen
- Untergrund und Montageort innen oder außen
- Betrachtungsabstand
- Montageseite und Leserichtung
- Gewünschte Farbe und Hintergrund
- Geschnittene Vinylfolie, gedruckter Aufkleber oder anderes Format
- Vektorgrafik oder ursprüngliche Rasterdatei in höchstmöglicher Auflösung
Bestätigen Sie einen Entwurf mit Schreibweise, Maßen, Schnittlinie, Bildausschnitt, Ausrichtung und Stückzahl. Lesen Sie den Leitfaden für individuell gedruckte Aufkleber oder entdecken Sie Aufkleber-Sonderanfertigungen.
So fotografieren Sie die Montagefläche
- Machen Sie eine gerade Gesamtaufnahme der Wand, Scheibe, Platte oder des Gegenstands.
- Fotografieren Sie Hindernisse, Ecken, Struktur und Schäden zusätzlich aus der Nähe.
- Platzieren Sie ein Lineal oder ein deutlich beschriftetes Referenzmaß in derselben Ebene wie die Oberfläche.
- Vermeiden Sie Weitwinkelverzerrungen, wenn genaue Proportionen wichtig sind.
- Schneiden Sie Rahmen, Griffe, Möbel und angrenzende Flächen nicht aus dem Bild.
- Kennzeichnen Sie mehrere Flächen so, dass Fotos und Maßliste eindeutig zusammenpassen.
Häufige Messfehler
| Fehler | Bessere Vorgehensweise |
|---|---|
| Die Größe anhand eines Wohnraumfotos wählen | Die genauen schriftlichen Maße verwenden und auf der Fläche markieren |
| Die gesamte Wand oder Tür ausmessen | Die nutzbare Fläche nach Abzug der Hindernisse messen |
| Rechtwinklige Ecken und Rahmen voraussetzen | An mehreren Stellen messen und eine waagerechte oder lotrechte Referenz verwenden |
| Nur eine Abmessung angeben | Breite, Höhe und gegebenenfalls Tiefe übermitteln |
| Die fertige Anordnung nicht berücksichtigen | Einzelteile, Trägerbogen und installierte Komposition unterscheiden |
| Einen Screenshot als Druckvorlage verwenden | Die ursprüngliche Vektordatei oder die Datei mit höchster Auflösung senden |
| Beliebig zusätzliches Material einplanen | Die Anbieterangaben zu Beschnitt, Musterrapport und Montagezugaben befolgen |
| Sich allein auf ein Foto verlassen | Fotos mit überprüften Maßen vom Montageort kombinieren |
Checkliste für Ihre Bestellanfrage
- Produkt- oder Projektart
- Material und Zustand des Untergrunds
- Nutzbare Breite, Höhe und Tiefe
- Maße und Positionen aller Hindernisse
- Innen- oder Außenbereich
- Betrachtungsseite, Leserichtung oder Kameraposition
- Stückzahl und Motivversion
- Gewünschter Termin und Lieferziel
- Gerade Fotos mit Referenzmaßen
- Gegebenenfalls bestätigter Produktionsentwurf
Häufig gestellte Fragen
In welcher Einheit sollte ich die Maße angeben?
Wählen Sie Zentimeter oder Zoll. Beim Wechsel der Einheit werden eingegebene Werte umgerechnet. Sie können einen Punkt oder ein Komma verwenden, zum Beispiel 24.5 oder 24,5.
Sollte ich zusätzliches Material einplanen?
Nur nach den Vorgaben des Produkts oder Anbieters. Fototapeten, Dekorfolien und vollflächige Fensterfolien können unterschiedliche Zugaben benötigen.
Kann Decords die Maße aus einem Foto berechnen?
Ein Foto kann die Einschätzung unterstützen. Für eine maßgenaue Fertigung werden dennoch vor Ort überprüfte Maße benötigt.
Was bedeutet die ausgewählte Größe bei einem mehrteiligen Produkt?
Sie kann sich auf ein einzelnes Element, den Trägerbogen oder die vorgeschlagene fertige Anordnung beziehen. Prüfen Sie vor der Bestellung die jeweilige Produktbeschreibung.
Warum muss ich die Tiefe messen?
Sie ist bei räumlichen 3D-Produkten, Regalen, Nischen, Möbelkanten und Fahrzeugrundungen sowie für Freiräume an beweglichen Teilen wichtig.
Welche Angaben benötigt Decords für ein individuelles Angebot?
Senden Sie nutzbare Maße, Stückzahl, Untergrund, Motivdatei, Fotos, Lieferziel und Verwendungszweck. Geben Sie Hindernisse und den gewünschten Montagetermin an.