Vannitoa seinad peavad vastu karmile kliimale: aur, kuumus, pritsmed ja sagedane puhastamine. Värv tuhmub, vuugitäidis määrdub kergesti ja klassikaline tapeet lihtsalt ei ela sellises keskkonnas. Niiskuskindlad seinakleebised lahendavad selle probleemi. Need võimaldavad teil plaate või värvitud seinu värskendada ilma renoveerimiseta, on kergesti puhastatavad ning neid saab eemaldada või vahetada alati, kui soovite uut välimust. Sellest juhendist saate teada, kuidas vannitoa seinakleebised toimivad, millised materjalid niisketes ruumides vastu peavad, kuidas valida õige disain ja kuidas pindu ette valmistada, et kleebised paigal püsiksid.
Mis teeb vannitoa seinakleebised tavalistest seinakleebistest erinevaks?
Vannitoa seinakleebised on loodud niiskuse, auru ja puhastamise jaoks. Nende puhul kasutatakse tugevamaid kilesid, suletud pindu ja liime, mis toimivad siledatel, mittepoorsetel pindadel, nagu plaadid, klaas ja dušipaneelid. Tavalised toakleebised, mis on mõeldud magamistubade või elutubade jaoks, kaotavad niisketes ruumides sageli haarduvuse või hakkavad servadest kooruma.
Niiskuskindel kleebis on valmistatud stabiilsele vinüül- või polüesterkilele. See kile on paksem ja vastupidavam kui tavalised seinakleebised. See püsib auru all tasane, on vastupidav väikestele kriimustustele ja ei deformeeru toatemperatuuri muutudes. Kuna pind on tihendatud, libiseb vesi pinnalt maha, mitte ei imbu sisse, mis hoiab ära mullitamise.
Liim on veel üks oluline erinevus. Vannitoa seinakleebised tuginevad liimidele, mis nakkuvad hästi läikivate pindadega. Need püsivad kindlalt isegi siis, kui ruum kuuma duši all soojeneb. Samal ajal on need liimid aeglaselt eemaldatavad, nii et te ei kahjusta oma plaate kujunduse uuendamisel.
Prindikvaliteet on samuti oluline. Vannitubades puutuvad kleebised kokku otsese päikesevalguse, auru ja regulaarse pühkimisega. Seetõttu kasutatakse kvaliteetsetes toodetes UV-stabiilseid ja veekindlaid tinti, mis ei tuhmu ega määri. Odavamad kleebised võivad alguses head välja näha, kuid mõne nädala pärast puhastamist võivad need praguneda, kooruda või värvi muuta.
Need kombineeritud omadused tagavad, et vannitoa seinakleebised püsivad ilusad ja funktsionaalsed tingimustes, kus tavalised seinakleebised ebaõnnestuvad.
Millised niiskuskindlad materjalid ja viimistlusmaterjalid sobivad vannitubades kõige paremini?
Kõik kleebismaterjalid ei talu vett ja puhastamist ühtemoodi. Vannitoa kleebised vajavad kilesid, mis jäävad elastseks, stabiilseks ja kergesti puhastatavaks isegi pärast kuude pikkust kokkupuudet auruga.
Vinüülkile on kõige levinum valik. See on piisavalt painduv, et järgida väikeseid plaatide vuuke ja nakkub väga hästi keraamika ja klaasiga. Vannitubade jaoks sobib tavaliselt kõige paremini keskmise paksusega vinüülkile: õhukesed kiled rõhutavad iga vuugijoont, samas kui väga pakse kilesid on raskem ilma mullideta paigaldada.
Polüesterkile on veel üks hea valik. See on mõõtmetelt stabiilsem ja kahaneb aja jooksul vähem. See aitab pikkade ja kitsaste kleebiste puhul, näiteks pritsmekaitsel kulgevate lineaarsete mustrite või peeglite ümber olevate aktsentääriste puhul. Mõnel polüesterkilel on spetsiaalsed katted, mis parandavad värviküllastust ja kaitset kriimustuste eest.
Ka pinnaviimistlus määrab välimuse. Läikivad kiled peegeldavad valgust ja jäljendavad glasuurplaatide läiget, muutes ruumi puhta ja värske tundega. Mattviimistlus pehmendab peegeldusi ja peidab paremini väiksemaid kriimustusi. Tekstuurviimistlus loob kivi või betooni mulje, kuid vajab siiski vett tõrjuvat pealiskihti.
Puhastustaluvus on oluline. Kvaliteetseid vannitoakleebiseid saab puhastada pehme käsna ja õrna seebiga ilma värvi kaotamata. Vältida tuleks abrasiivseid patju ja karme kemikaale, kuid lihtne igapäevane puhastamine ei tohi kilet ega trükist kahjustada.
Aja jooksul säilitavad parimad kiled oma värvi, jäävad paindlikuks ja väldivad servade kollasust.
Kuidas valida vannitoa seinakleebiseid, mis sobivad teie plaatide ja stiiliga
Õige disain võib muuta iga vannitoa suurust. Kuna kleebised kleepuvad otse plaatidele või värvile, tuleb arvestada, kuidas värv, muster ja skaala olemasolevate pindadega suhestuvad.
Alusta aluskihist: oma plaatidest. Kui need on tavalised valged või heledates neutraalsetes toonides, on sul rohkem vabadust. Erksamad värvid, geomeetrilised kujundid või julged mustrid tulevad kenasti esile. Kui su plaatidel on juba tekstuur või erksad detailid, vali lihtsamad motiivid vähemate värvidega, et sein ei tunduks ülekoormatud.
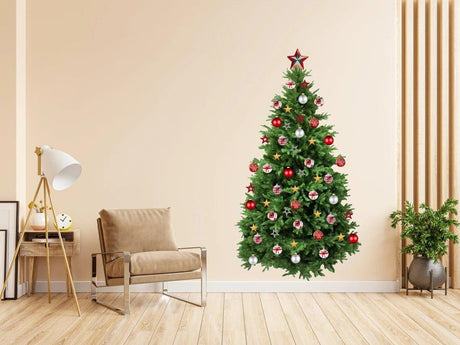
Skaala aitab määratleda visuaalset voolavust. Suured motiivid, nagu ülisuured lehed, voolavad lainemustrid või laiad pintslitõmbed, sobivad kõige paremini suurtele avatud seintele. Need venitavad ruumi visuaalselt ja vähendavad segadust. Väiksemad motiivid, näiteks hajutatud täpid või miniatuursed plaatide kleebised, sobivad kitsastesse kohtadesse valamute kohal või peeglite ümber. Väikestes vannitubades võib liiga paljude mustrisuuruste segamine tekitada visuaalset müra, seega hoidke skaala ühtlane.
Värvil on ka funktsionaalne roll. Helesinised, rohelised, liivakarva ja pehmed hallid toonid loovad puhta ja värske meeleolu. Need sobivad hästi valgete valgustitega ja aitavad akendeta vannitubades valgust peegeldada. Tumedamad kleebised võivad küll dramaatilised välja näha, kuid võivad veeplekke selgemini esile tõsta.
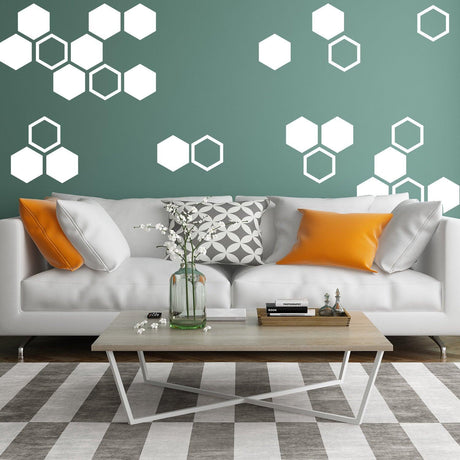
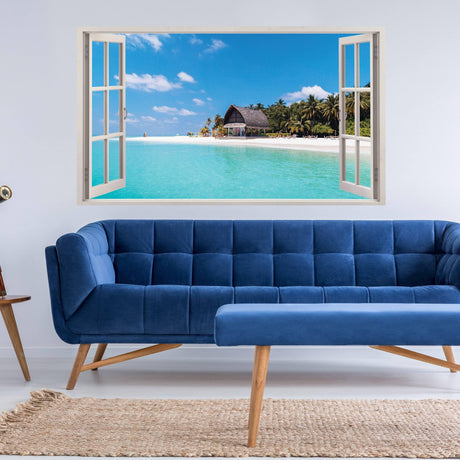
Mõned teemad tunduvad niisketes ruumides loomulikud: lained, ookeanimotiivid, karbid, minimalistlikud botaanilised elemendid või abstraktsed geomeetrilised jooned. Need seovad ruumi funktsiooni soovitud meeleoluga.
Millised disainid sobivad kõige paremini väikestesse või akendeta vannitubadesse?
Väikestes või akendeta vannitubades on kasulikud vertikaalsed motiivid, mis pilku tõstavad. Kõrged taimede siluetid, vertikaalsed triibud või lae lähedal olevad mustrilised äärised loovad kõrgust. Kasutage raskete tumedate kujundite asemel pehmet kontrasti, et ruum tunduks avar. Heledad metallik- või peegelaktsendid võivad nurki heledamaks muuta, kuid kasutage neid säästlikult.
Väldi tihedaid mustreid igal seinal. Piisab ühest esiletõstetud seinast. Liigne kaunistamine muudab väikesed vannitoad sageli veelgi väiksemaks.
Kuidas plaate ja seinu enne vannitoa seinakleebiste paigaldamist ette valmistada
Ettevalmistus on määravaks teguriks, kas kleebised on vastupidavad või kooruvad. Vannitubadesse kogunevad seebijäägid, katlakivi ja puhastusvahendid, mis kõik nõrgestavad nakkuvust, kui need pinnale jäävad.
Puhastage sein hoolikalt õrnatoimelise pesuvahendiga, mis eemaldab rasva ja seebi. Loputage puhta veega ja kuivatage ebemevaba lapiga. Kontrollige vuugivahesid. Kui vuugitäide on plekiline, märg või murenev, parandage see enne kleebiste paigaldamist. Kleebised nakkuvad kõige paremini tasasetele plaatidele ja siledale värvile.
Kui teie disain asetab kleebised osaliselt vuugitäite peale, kontrollige, et vuugitäide oleks täielikult kuivanud ja ühtlane. Väga sügavad või ebaühtlased vuugitäitejooned võivad kile alla õhutaskuid tekitada. Tugevama haarduvuse saavutamiseks proovige suurem osa liimist kanda siledatele pindadele.
Paigalda kleebiseid ainult siis, kui vannituba on täiesti kuiv. Ära paigalda neid pärast dušši või niiske õhu korral. Niiskus paigaldamise ajal võib kile alla auru koguneda ja nakkuvust vähendada. Vajadusel ava aken või käivita ventilaator.
Pärast puhastamist ja kuivatamist planeeri oma paigutus. Kasuta maalriteipi positsioonide testimiseks, servade joondamiseks ja pikkade kleebiste sirgena hoidmiseks. See on eriti kasulik geomeetriliste mustrite või ääriste puhul, kus joondusviga on nähtav.
Kuidas hoida niiskuskindlaid kleebiseid puhtana ja hallituseta
Niiskuskindlad kleebised vajavad vaid lihtsat hooldust. Pühkige neid plekkide eemaldamiseks pehme lapi ja õrna seebiga. Loputage ja kuivatage, et vesi ei jääks servadele liiga kauaks. Vältige tugevate pesuvahendite pihustamist otse kilele.
Kui kleebised on duši lähedal, asetage need kohta, kus need saavad pritsmeid, aga mitte täielikku veejoa. Dušipea pidev surve võib servi aeglaselt nõrgestada.
Kui nurk tõuseb üles, suruge seda õrnalt tagasi, kui sein on kuiv. Pidev tõusmine viitab pinnaprobleemile või liiga niiskesse kohta paigutamisele. Sellistel juhtudel võib ümberpaigutamine paremini toimida.
Ostja juhend: kuidas valida parimad vannitoa seinakleebised Decordsist
Decordsi sirvides kontrollige kolme aspekti: sobivus märgruumidesse, materjali üksikasjad ja disaini paindlikkus.
Otsige pakkumisi, mis mainivad otseselt vannitube , märgruume või niiskuskindlaid kilesid. Ainult magamistubade või elutubade jaoks mõeldud tooted ei pea sageli duširuumi niiskuses vastu.
Seejärel lugege materjali kirjeldust. Tugevas loetelus on märgitud vinüül- või polüesterkile, paksus ja viimistlus (läikiv, matt või tekstuurne). Paljudes vannitoakleebistes on soovitatud pindadena mainitud plaate, klaasi, plastpaneele või siledaid värvitud seinu.
Pärast materjali kvaliteedi kontrollimist valige disain, mis sobib teie plaatide ja sisustuselementidega. Decordsist saate kombineerida sobivaid komplekte või luua kooskõlastatud ilme ookeaniteemade, geomeetriliste ääriste või minimalistlike botaaniliste kujunditega.
Enne tellimist kasutage lihtsat kontrollnimekirja.
Kontrollnimekiri enne vannitoa seinakleebiste ostmist:
- Pakkumises on kirjas, et need sobivad vannitubadesse või märgadesse ruumidesse.
- Materjal on niiskuskindel ja paksus on märgitud.
- Soovitatavate pindade hulka kuuluvad plaadid, klaas või mittepoorsed seinad.
- Kleebised võimaldavad õrna puhastamist maheda seebiga.
- Kujunduse suurus sobib teie seina- või plaatide mustriga.
Mõtle ka tulevastele uuendustele. Kui plaanid vannituba uuesti värskendada, vali kaubamärgid, mis pakuvad sobivaid komplekte. Nii on hiljem lihtne disaini laiendada või kohandada ilma kõike välja vahetamata.
Õigete vannitoa seinakleebistega saate oma ruumi ühe õhtuga uuendada. Tuba muutub puhtamaks, heledamaks ja isikupärasemaks ilma renoveerimiskuludeta.